
- understanding-campfire-heat
- choosing-the-right-dutch-oven
- managing-heat-for-cooking
- techniques-for-campfire-dutch-oven-cooking
- real-life-camping-stories
- why-camp-spotter-is-your-go-to-source
1. Understanding Campfire Heat
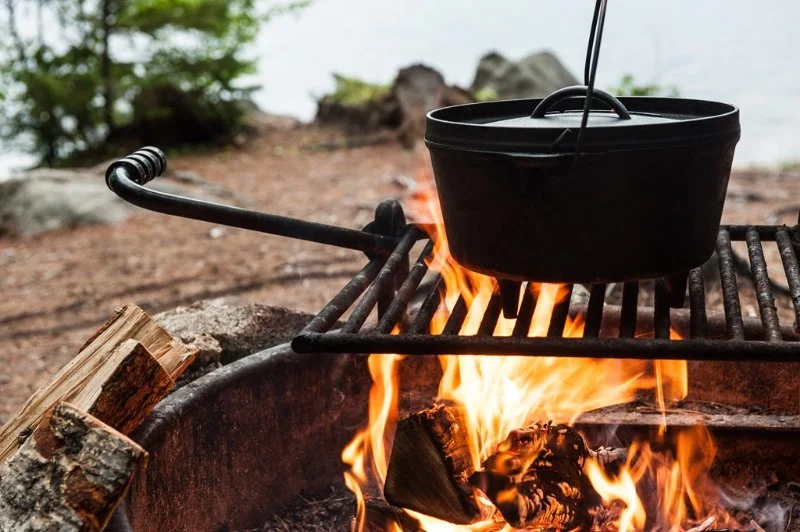
Learning how to use campfire heat to cook in a Dutch oven starts with understanding the fire itself. A campfire produces uneven heat, with flames, embers, and ashes all contributing differently to cooking. Embers are ideal for controlled cooking because they provide steady heat, while open flames are unpredictable and can scorch food. Knowing where and how to position your Dutch oven makes all the difference in the outcome of your meals.
2. Choosing the Right Dutch Oven
2.1 Size and Capacity
The size of the Dutch oven matters depending on the group you are cooking for. Smaller ovens are perfect for couples, while larger ones can feed a whole family. A 12-inch oven is often considered the most versatile option for campfire cooking.
2.2 Material and Lid Design
Cast iron is the traditional choice because of its excellent heat retention. Lids with raised rims are especially useful, allowing hot coals to be placed on top for even heat distribution, essential when baking bread or cooking stews.
3. Managing Heat for Cooking
3.1 Using Embers Instead of Flames
Cooking directly over flames can burn food quickly. Instead, allow wood to burn down into glowing coals. Place your Dutch oven on a bed of embers and adjust the number of coals to control temperature.
3.2 Estimating Temperature
A common technique is the “hand test”—holding your hand about six inches above the coals to gauge heat. If you can only hold it there for 2–3 seconds, the fire is very hot; 5–7 seconds indicates medium heat, perfect for stewing or baking.
3.3 Rotating the Oven
To avoid hot spots, rotate the oven and lid periodically. This ensures even cooking, especially when preparing foods like cobblers or roasts.
4. Techniques for Campfire Dutch Oven Cooking
4.1 Baking with Top and Bottom Heat
For baked goods such as biscuits or cakes, place embers both under the Dutch oven and on the lid. This method creates an oven-like environment right at your campsite.
4.2 Stewing and Braising
Stews and braises benefit from low, steady heat. By burying the Dutch oven partially in coals and covering it with more embers, you can create long-lasting heat that simmers food to perfection.
4.3 Frying and Searing
High, direct heat from freshly added coals is ideal for frying. Make sure to preheat your Dutch oven properly before adding oil and ingredients to achieve a crisp sear.
5. Real-Life Camping Stories
On a camping trip in Colorado, a group of friends used their Dutch oven to bake fresh sourdough bread in the wilderness. By carefully managing coals, they achieved a golden crust and soft interior, turning breakfast into an unforgettable memory. Another camper in Utah shared how a Dutch oven stew simmered over coals for hours became the highlight of a chilly evening, proving that with patience and technique, campfire meals can rival those cooked in a modern kitchen.
6. Why Camp Spotter Is Your Go-To Source
Mastering Dutch oven cooking requires the right tools and guidance. Camp Spotter provides carefully curated gear and expert advice to make your outdoor cooking experience safe and enjoyable. From high-quality Dutch ovens to accessories for managing campfire heat, Camp Spotter ensures you are equipped to succeed on your next adventure.
 Wheel Estates Mobile Home Park and Self Storage3.0 (62 reviews)
 Camp Three Campground4.0 (99 reviews)
 Nickerson State Park - Area 55.0 (7 reviews)
 Pay & Stay RV Park4.0 (7 reviews)
 Peninsula Campground4.0 (62 reviews)
 Beacon Hill Camping4.0 (222 reviews)
 The Best Campsites for Mountain Biking Adventures
 How to Store Food Safely While Camping in Bear Country
 How to Find and Use Natural Water Sources While Camping – Safe Outdoor Hydration Guide
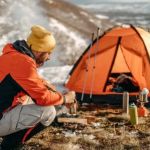 Top 5 Tips for Camping in Cold Weather
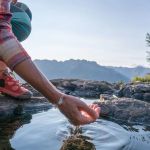 How to Find and Purify Water in the Wild for Camping Safety
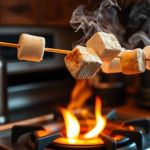 How to Cook Marshmallows Without Burning Them: Tips and Techniques