
- 1-Why Build a Campfire Bench from Logs?
- 2-Gathering Materials for Your Campfire Bench
- 3-Step-by-Step Guide to Building a DIY Campfire Bench
- 4-Finishing Touches and Maintenance Tips
- 5-Adding Your Campfire Bench to Your Campsite
1-Why Build a Campfire Bench from Logs?
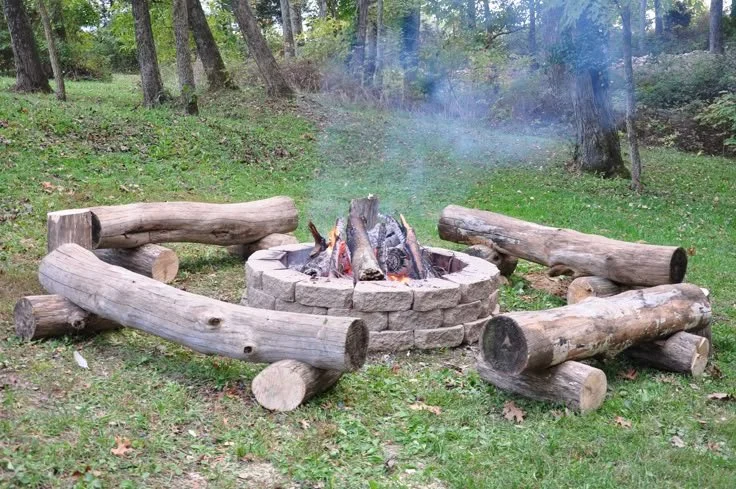
Building your own campfire bench from logs is an excellent way to create functional and rustic seating for your outdoor space. Not only does it add a natural, earthy aesthetic to your campsite or backyard, but it’s also a rewarding project that you can do yourself. Log benches provide sturdy, durable seating and are the perfect addition to any campfire area.
One of the greatest benefits of using logs for your campfire bench is that they are readily available, especially if you have access to your own property or a nearby wooded area. Additionally, this DIY project is cost-effective and offers a way to create custom outdoor furniture that fits the exact size and style you need for your space. Whether you're setting up a cozy campfire circle or simply looking for a place to relax outdoors, a log bench can elevate your campfire experience.
2-Gathering Materials for Your Campfire Bench
Before you start building your DIY campfire bench, it’s important to gather the right materials. Here’s what you’ll need for a simple, functional log bench:
1. Logs
The main material you’ll need for your bench is, of course, logs. Ideally, you should select logs that are sturdy and have a diameter large enough to provide comfortable seating. You can choose logs from a variety of tree types depending on availability, such as oak, pine, or cedar. Oak is particularly durable, while cedar has a pleasant aroma that’s perfect for an outdoor setting.
2. Saw
A saw is necessary to cut the logs to the appropriate length. A chainsaw is ideal for larger logs, but a hand saw will work fine for smaller logs or if you prefer a more hands-on approach.
3. Drill and Screws
You’ll need a drill to secure the logs together. Depending on the design of your bench, you may need screws to attach the logs securely. Choose screws that are long enough to go through the thickness of the logs but not so long that they protrude out the other side.
4. Sandpaper
Sanding your logs will smooth out any rough edges and ensure that the bench is comfortable to sit on. Sandpaper with a medium to coarse grit should be used for the initial sanding, followed by a finer grit to smooth out the surface.
3-Step-by-Step Guide to Building a DIY Campfire Bench
Once you’ve gathered your materials, it’s time to start building your campfire bench! Here’s a step-by-step guide to creating a simple, durable bench:
Step 1: Cut the Logs to Length
Using your saw, cut the logs to the desired length. The length will depend on how many people you want to seat on your bench. A typical log bench is around 4-6 feet long, but you can adjust the size according to your needs. Be sure to cut the logs evenly, so your bench sits flat.
Step 2: Prepare the Bench Seat
Lay out the logs side by side, forming the base of the bench. If you're using large logs, you may want to create a stable, flat surface by cutting them down further into a more manageable size. Arrange the logs so that they’re evenly spaced and aligned. This step will determine how comfortable the seat is, so take your time to ensure they’re arranged properly.
Step 3: Attach the Logs Together
To keep the logs together, use a drill to make pilot holes and secure them with screws. You can drill holes along the sides of the logs, then insert the screws to hold them together. This will give your bench stability, ensuring it’s safe for sitting.
Step 4: Sand the Logs
Once the logs are secured, use sandpaper to smooth the surface of the logs and remove any rough edges. This will prevent splinters and make the bench more comfortable to sit on. Pay attention to the edges and the top of the seat to ensure they’re free from sharp points.
Step 5: Finishing Touches
For added protection, you may want to apply a wood finish or sealant to your log bench. This will help preserve the wood and protect it from the elements. Choose a wood finish that is suitable for outdoor use, such as a weatherproof or water-resistant product.
4-Finishing Touches and Maintenance Tips
After you’ve built your campfire bench, it’s time to add some finishing touches. Consider adding cushions or throws to make the bench more comfortable for longer sittings. Outdoor fabric that resists mildew and moisture will ensure that your cushions last longer, especially during the colder months.
Maintenance of your log bench is simple but essential for longevity. Regularly check for any signs of wear and tear, especially if it’s left outside in the elements. Apply a fresh coat of wood sealant every year to keep the bench in top condition. Additionally, try to keep the bench off the ground to prevent moisture from soaking into the logs.
5-Adding Your Campfire Bench to Your Campsite
Now that your DIY campfire bench is ready, it's time to add it to your campsite. Place your bench around your campfire, making sure it's at a safe distance from the flames. Log benches create a cozy and rustic atmosphere, perfect for relaxing with friends and family while enjoying the warmth of the fire.
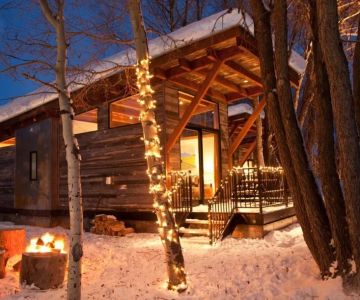
To enhance the experience, consider adding some ambient lighting like string lights or lanterns around the bench area. This will not only improve visibility but also add to the overall ambiance of your outdoor space.
If you're looking for more camping tips or need help finding the right tools and materials, visit Camp Spotter for expert recommendations and the best outdoor products to make your camping experience even better.

 Mason Woods MHP LLC3.0 (27 reviews)
 Lincoln Park Campground4.0 (45 reviews)
 Martin's Pier II Campgrounds & Marina4.0 (6 reviews)
 Promontory Park Campground4.0 (288 reviews)
 Hidden Glen Mobile Home Park4.0 (4 reviews)
 Benchmark Campground4.0 (11 reviews)
 How to Plan a Cross-Country RV Trip on a Budget
 What to Do When It Rains on Your Camping Trip
 How to Plan a Multi-Day Camping Adventure: Tips for an Unforgettable Experience
 How to Make Camping Cozy Even in Cold Weather
 The Best Time of Year for Campfire Camping in Europe Explained
 How to Prepare for Insect Bites and Stings While Camping