
The Art of Campfire Photography: Tips and Tricks
- Understanding Campfire Lighting
- Gear and Settings for Campfire Photos
- Composing the Perfect Campfire Shot
- Capturing Mood and Details
- Real-Life Examples and Stories
- How to Edit Your Campfire Photos
1. Understanding Campfire Lighting
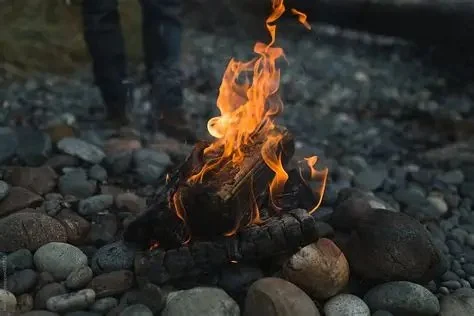
Campfire photography presents unique lighting challenges. The flickering glow of a campfire creates dramatic effects but can also leave you grappling with shadows and uneven lighting. Understanding how to use campfire lighting effectively is key to capturing beautiful and compelling photos.
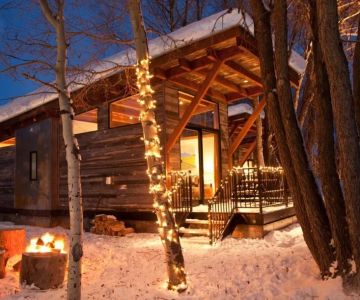
When photographing campfires, it's essential to consider the warm, orange tones that the fire casts. These can be both beautiful and challenging, as they tend to create very high contrast between the firelight and the surrounding darkness. This contrast can be used creatively to highlight specific elements of your photo, such as a person, the fire itself, or nearby objects like tents or trees. However, it’s important to balance the exposure to avoid overexposing the fire or losing details in the shadows.
2. Gear and Settings for Campfire Photos
The right gear and settings are essential for successful campfire photography. Here are the basics of what you’ll need:
- Camera: A DSLR or mirrorless camera is ideal for low-light photography, as it allows you to manually control your settings.
- Lens: A fast lens (with a low f-stop, such as f/1.8 or f/2.8) is perfect for campfire photography. It allows you to capture more light, helping to brighten up the dark surroundings while maintaining focus on the fire.
- Tripod: Because you’ll often be shooting in low-light conditions, a tripod is essential to avoid camera shake and ensure sharp images during long exposures.
- Settings: Set your camera to manual mode to have complete control over exposure. Start with a low ISO setting (around 800 to 1600) to reduce noise, a wide aperture (f/2.8 to f/4) to allow more light in, and a slower shutter speed (around 1/60 to 1/125) to properly expose the fire and surrounding elements.
These settings can be adjusted depending on the intensity of the campfire and the surrounding light conditions. Experimenting with your camera’s settings will help you get the best results.
3. Composing the Perfect Campfire Shot
Composition plays a significant role in campfire photography. A good composition can turn a simple campfire shot into a stunning, atmospheric image. Here are a few composition tips to keep in mind:
- Rule of Thirds: Position the campfire off-center in your frame for a more dynamic shot. This creates a more balanced and visually interesting image, drawing attention to both the fire and the surrounding environment.
- Framing: Use natural elements like trees, rocks, or tents to frame the campfire. This adds context and depth to your image, making it feel more immersive.
- Silhouettes: Experiment with silhouettes of people or objects in front of the fire. This can create a dramatic effect and add an emotional layer to the photo, enhancing the campfire’s warmth and ambiance.
Play around with different angles, perspectives, and distances to find the most compelling composition for your shot.
4. Capturing Mood and Details
The beauty of campfire photography is in the mood it creates. The soft glow of the fire, the crackling sounds, and the warmth it provides all contribute to a sense of coziness, relaxation, and connection with nature. To capture the true essence of a campfire scene, focus on both the big picture and small details:
- Close-up Details: Capture the flickering flames, glowing embers, or the steam rising from a kettle placed near the fire. These small details tell the story of the campfire experience.
- People Around the Fire: Show people enjoying the warmth of the campfire. Whether they’re roasting marshmallows or simply relaxing, their expressions and body language can add a personal touch to the image.
- Background and Environment: Include the surrounding environment in your shot to tell the full story. Whether it’s a forest, mountains, or a clear night sky, the setting adds context and atmosphere to the campfire scene.
Capturing these elements will help you tell a complete visual story that evokes the full experience of being around a campfire.
5. Real-Life Examples and Stories
A photographer shared their experience of capturing the perfect campfire photo while camping in the Adirondack Mountains. They used a slow shutter speed to capture the movement of the flames while allowing the surrounding trees to form a natural frame. The result was a mesmerizing image with glowing red and orange hues, showcasing the beauty and tranquility of the wilderness at night. This example highlights how patience and the right techniques can yield stunning results when photographing campfires.
In another case, a family spent a chilly evening by the fire in a remote location. The photographer used a high ISO setting to capture the warmth and intimacy of the moment, with the firelight illuminating their faces. The image, with its soft light and deep shadows, captured the essence of togetherness around a campfire. This story emphasizes how campfire photography can be more than just about the fire—it’s about the experience and the emotions tied to the moment.
6. How to Edit Your Campfire Photos
Editing your campfire photos can help bring out the details of the fire and enhance the mood of the scene. Here are some editing tips:
- Adjust the Exposure: Fine-tune the exposure to ensure the fire is not overexposed while bringing out the details in the surrounding shadows.
- Enhance the Warmth: Increase the warmth or adjust the white balance to bring out the golden tones of the fire and create a cozy feel.
- Sharpen the Details: Apply selective sharpening to highlight key elements of the scene, such as the flames or facial expressions of people around the fire.
These simple edits can help elevate your campfire photography, making it look even more captivating and professional.
If you're looking for the best gear, accessories, or expert tips for your next camping trip or photography project, visit Camp Spotter for the most reliable recommendations tailored to your needs.
 Northern Exposure Toll Booths4.0 (44 reviews)
 Coronado Mobile Home Park4.0 (24 reviews)
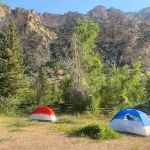 Willows Campground4.0 (18 reviews)
 Winhall Brook Campground4.0 (149 reviews)
 Yellowstone Dreamin Camp4.0 (132 reviews)
 Indian Lake Islands Campground - Campsite #205.0 (1 reviews)
 RV Camping Essentials for Remote Mountain Trips: What You Need for the Perfect Experience
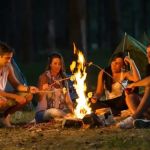 Best Campfire Ideas for Group Camping Experiences
 How to Choose the Perfect Campsite This Weekend: A Beginner’s Guide
 Cottages Near Me Perfect for a Holiday Family Gathering
 Top 5 Campsites for Winter Outdoor Activities in the US
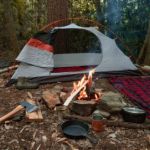 How to Use Campfire Smoke to Keep Mosquitoes Away Naturally