
- how-to-make-campfire-breadsticks-step-by-step
- campfire-breadsticks-ingredients-and-tools
- techniques-for-perfect-breadsticks-over-the-fire
- common-mistakes-and-how-to-avoid-them
- personal-story-the-first-time-i-tried-campfire-breadsticks
- recommendations-for-gear-and-campsites
1. How to Make Campfire Breadsticks: Step-by-Step
Making campfire breadsticks is a fun, rewarding activity that adds both flavor and experience to your outdoor adventures. These simple, dough-wrapped sticks cook over open flames and bring everyone together around the fire. Here's a detailed breakdown of how you can prepare and cook delicious breadsticks during your next camping trip.
1.1 Preparing the Dough
You can either make your dough at home or buy ready-made refrigerated biscuit dough. If you’re making it from scratch, go for a mix of all-purpose flour, a pinch of salt, baking powder, and warm water. A tablespoon of oil or butter adds softness. Knead until smooth, then wrap it in plastic and store in a cooler until ready to use.
1.2 Shaping and Wrapping
Roll the dough into long ropes, about 10 inches in length. Use clean, peeled green sticks or metal skewers. Wrap the dough around the stick in a spiral, pinching the ends so it doesn’t fall off. Make sure the wrap isn’t too thick — thinner layers cook more evenly.
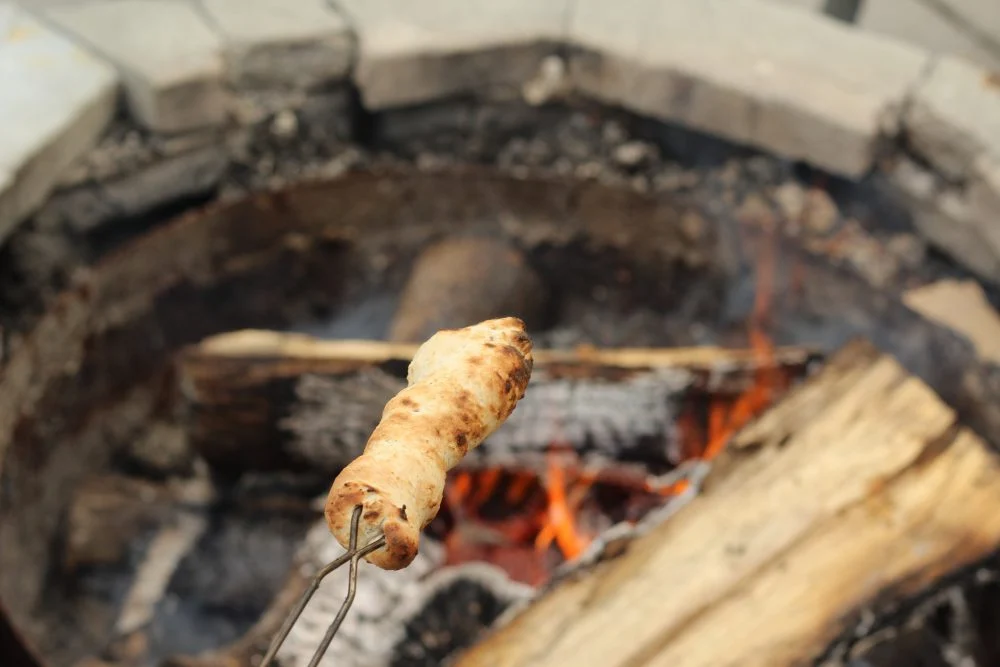
1.3 Cooking Over the Fire
Hold the stick over glowing coals — not direct flames — rotating slowly. It typically takes 8–12 minutes, depending on heat intensity. You'll know it’s ready when it’s golden brown and sounds hollow when tapped. Be patient; undercooking leads to doughy centers, while overcooking gives you a burnt crust.
2. Campfire Breadsticks Ingredients and Tools
2.1 Ingredient Essentials
Here’s a simple ingredient checklist to ensure your breadsticks taste amazing:
- 2 cups all-purpose flour
- 1 tsp salt
- 1 tbsp baking powder
- 2 tbsp oil or melted butter
- ¾ cup warm water
- Optional: grated cheese, herbs, garlic powder
2.2 Tools You’ll Need
Don’t forget these items when heading out:
- Green (fresh) sticks, peeled — or extendable metal skewers
- Mixing bowl (if making dough on-site)
- Cooking gloves or fire-safe tongs
- Fire-safe grate (optional but useful for steady cooking)
3. Techniques for Perfect Breadsticks Over the Fire
3.1 Mastering the Heat
Controlling heat is key. Avoid direct flames — they’ll burn the outside before the inside cooks. Instead, use the edge of the firepit where embers glow. Rotate consistently and don’t rush the process.
3.2 Flavor Enhancements
Want to take your breadsticks up a notch? Try brushing the finished product with melted garlic butter or sprinkling cinnamon sugar before wrapping. These small additions can turn a simple snack into a camping favorite.
3.3 Getting Kids Involved
Kids love making these. Let them help knead and roll the dough, then safely supervise them while they cook. This can be a perfect learning experience — not just about food, but patience and fire safety, too.
4. Common Mistakes and How to Avoid Them
4.1 Overpacking the Dough
Thick dough takes too long to cook and will be raw inside. Keep it thin and even — about ½ inch thick maximum.
4.2 Ignoring Fire Control
If the fire’s too strong, the breadstick will burn. Let the fire settle into glowing coals before you start cooking. This ensures an even, controlled cook.
4.3 Skipping the Pre-Check
Test one breadstick before cooking for the whole group. This helps you fine-tune the position, time, and rotation needed to get perfect results.
5. Personal Story: The First Time I Tried Campfire Breadsticks
My first attempt at campfire breadsticks was a mix of excitement and chaos. We were at a lakeside site, and I’d read about these treats online. I forgot to bring oil, used sticks that were too dry (yes, one caught fire), and ended up with charred dough. But after that learning curve, the next morning’s batch — with a little help from a fellow camper who shared garlic butter — turned out golden, fluffy, and unforgettable. Since then, it's been a staple of every trip.
6. Recommendations for Gear and Campsites
6.1 Best Tools for the Job
If you’re planning to make this a tradition, invest in telescoping skewers with wooden handles. They’re safe, reusable, and easy to clean. A fire pit with a cooking grate helps maintain control, and carrying a small cast-iron pan adds versatility for other campfire recipes.
6.2 Where to Find the Right Supplies
For reliable outdoor cooking gear and top-rated campsite recommendations, check out Camp Spotter. Whether you’re a weekend warrior or a seasoned backpacker, you’ll find curated products and campsite reviews that help elevate your outdoor cooking experience.
6.3 Campsites with Fire-Friendly Amenities
Look for sites with designated fire rings, access to dry wood, and flat ground near the fire area. Sites in forested parks often allow foraging green sticks (if permitted), which makes your cooking more traditional and fun.
 Johns Pond Village4.0 (10 reviews)
 Driftwood Campground & Rv Park4.0 (210 reviews)
 Lanikai Lane3.0 (27 reviews)
 Camp Pedro4.0 (325 reviews)
 Pammel State Park Campground4.0 (23 reviews)
 Hardridge Creek4.0 (231 reviews)
 Top 10 Must-Have Items for Beginner Campers
 The Best Campsites for Cross-Country Skiing Adventures
 How to Build a Campfire With Limited Resources in the Wild
 How to Cook Kebabs and Skewers Over a Campfire Grill
 The Best Campfire Drinks: Recipes for Cozy Nights
 How to Prepare for Rainy Weather During Camping – Tips and Essentials