
- Why You Need a Campfire Windshield
- Materials for Your DIY Campfire Windshield
- Step-by-Step Building Process
- Installing and Testing Your Campfire Windshield
- Tips for Maximizing Your Windshield’s Efficiency
- Alternative Ideas for Windshield Designs
Why You Need a Campfire Windshield
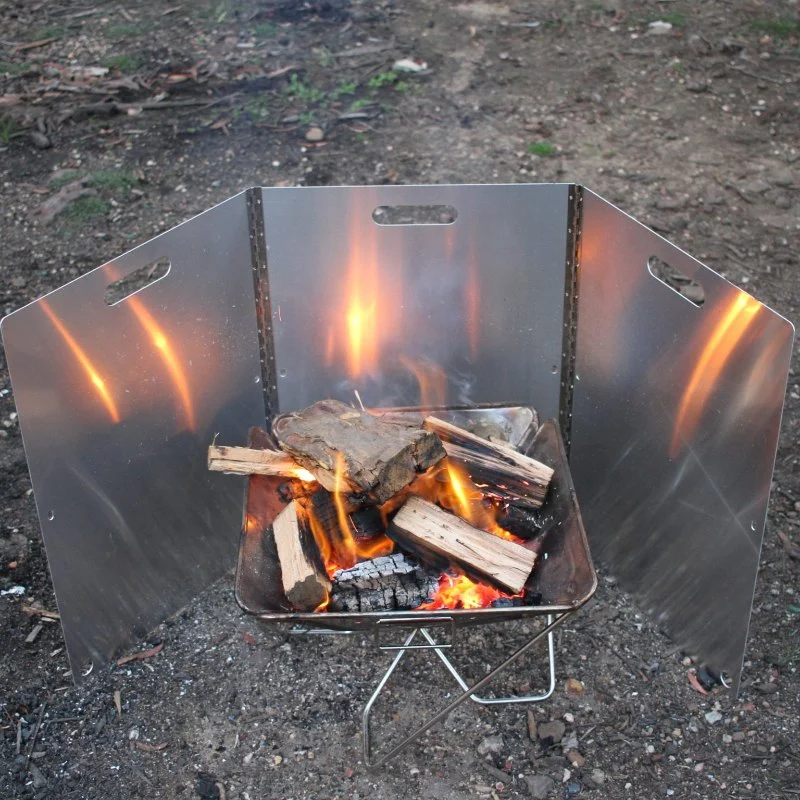
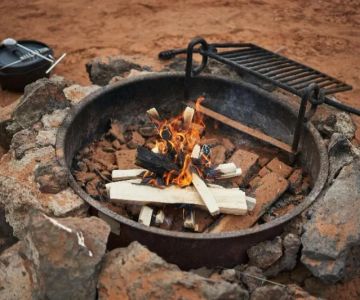
When camping, one of the most frustrating experiences can be trying to cook or keep your campfire going in windy conditions. Wind can easily blow out a fire, making cooking difficult and ruining the ambiance. A campfire windshield is a simple solution to prevent wind from interfering with your fire, ensuring it stays burning efficiently and safely.
A well-designed windshield not only helps maintain heat for cooking but also reduces smoke, providing a more pleasant camping experience. In this article, we’ll show you how to build a DIY campfire windshield that will protect your fire and enhance your outdoor adventures.
Materials for Your DIY Campfire Windshield
Building a campfire windshield requires a few basic materials. Here’s a list of what you’ll need:
- Metal Sheets or Aluminum Foil: These materials are heat-resistant and will block wind effectively. Aluminum foil is lightweight and easy to handle, while metal sheets provide more durability.
- Stakes or Pegs: To secure the windshield to the ground, you’ll need stakes or pegs. These should be sturdy enough to hold the windshield in place, even in gusty winds.
- Wire or String: For added stability, wire or string can help attach the windshield to the stakes or hold the edges together.
- Scissors or Shears: You’ll need a pair of scissors or shears to cut your materials to the appropriate size.
- Optional: Reflective Material: Using reflective material on the inside of the windshield can help bounce heat back into the fire, making it more efficient.
With these materials, you'll be ready to start building your DIY windshield and take control of the elements!
Step-by-Step Building Process
Follow these simple steps to create a campfire windshield that will protect your fire from the wind:
1. Cut Your Metal Sheets or Aluminum Foil
Start by cutting your metal sheets or aluminum foil to a size that will cover the area around your campfire. The size will depend on the number of people you’re cooking for and the size of your campfire. Typically, a height of 12–18 inches works well for blocking wind and allowing for proper ventilation.
2. Shape the Windshield
If you're using metal sheets, bend them into a semicircular or U-shape, depending on your fire’s layout. If using aluminum foil, create multiple layers to ensure it’s sturdy enough to withstand wind. The goal is to have a barrier that’s high enough to block the wind from all directions around your fire.
3. Secure the Windshield
Next, use stakes or pegs to secure the windshield to the ground. Place the stakes in the ground around your fire and attach the windshield to them with wire or string. Ensure that the windshield is sturdy and won’t be blown over by the wind.
4. Add Reflective Material (Optional)
If you want to boost the efficiency of your campfire, attach reflective material (such as a Mylar blanket) to the inside of the windshield. This will reflect heat back into the fire, helping it burn hotter and brighter.
Installing and Testing Your Campfire Windshield
Once your windshield is assembled, it's time to install it around your campfire. Position the windshield about 6–12 inches from the edge of the fire, making sure that there’s enough room for proper airflow. You want to protect the fire from wind, but also allow it to breathe.
Light your campfire and test the windshield’s effectiveness. You should notice a reduction in the amount of smoke and wind interference. If the fire is still struggling to stay lit, consider adjusting the height or width of the windshield to better suit the conditions.
Tips for Maximizing Your Windshield’s Efficiency
To get the most out of your DIY campfire windshield, here are some tips:
- Position the Windshield Properly: Ensure that the windshield is positioned to block the most prevailing winds, usually from one side. Angle it to protect your fire and reflect heat back into the cooking area.
- Use Multiple Windshields: If the wind is particularly strong, consider using multiple smaller windshields to encircle your fire from all sides.
- Make It Portable: Keep your windshield lightweight and compact for easy transportation. This will allow you to take it on any camping trip, no matter how remote the location.
Alternative Ideas for Windshield Designs
If you want to get creative with your campfire windshield, here are some alternative designs that can provide additional benefits:
1. Using Rocks or Logs
If you don’t have metal sheets or foil, you can use large rocks or logs to create a natural barrier around your campfire. This works well in areas where there are plenty of rocks or downed timber, and it blends seamlessly into the natural landscape.
2. A Collapsible Windshield
For those who want a more flexible and easy-to-store option, consider creating a collapsible windshield using lightweight materials like bamboo or plastic. This design can be folded down for compact storage and set up in minutes when needed.
 Bayshore Park Inc4.0 (51 reviews)
 Son's Blue River Camp4.0 (1357 reviews)
 Idlewild Campground4.0 (100 reviews)
 Indio Springs RV Resort(Dogs are under strict regulations)4.0 (54 reviews)
 Still Creek Campground4.0 (96 reviews)
 Vue du Ville Community5.0 (2 reviews)
 Campfire Songs from Around the World – Discover Cultural Traditions
 Why Camping in National Parks Is Worth the Reservation Rush
 Cottages Near Me That Are Great for Couples’ Photoshoots
 Best Family-Friendly Campsites with Picnic Areas
 Top 5 Scenic Lake Campsites in the U.S. for Nature Lovers
 How to Navigate Without GPS While Camping Off-Grid