
- 1. Introduction to DIY Campfire Windshields
- 2. Why You Need a Windshield for Your Campfire
- 3. Materials You’ll Need to Build Your DIY Campfire Windshield
- 4. Step-by-Step Guide to Building Your Campfire Windshield
- 5. Additional Tips and Considerations for Using a Campfire Windshield
1. Introduction to DIY Campfire Windshields
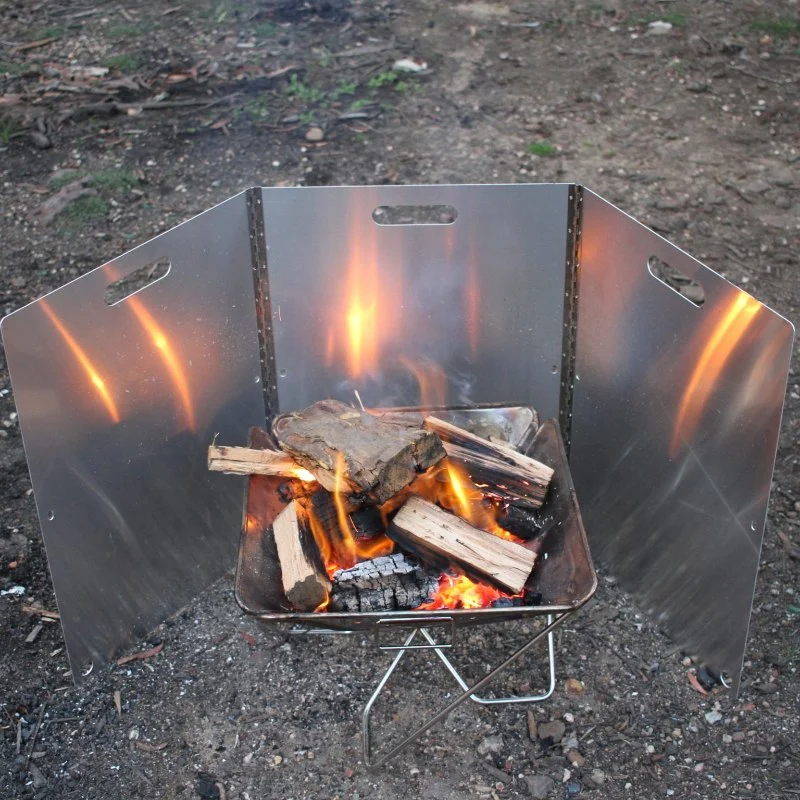
When camping, enjoying a fire is one of the most cherished outdoor experiences. However, wind can often interfere with your campfire, making it difficult to maintain. A simple solution to this issue is to create a DIY campfire windshield, which can help keep your fire strong and steady, even in windy conditions. In this article, we’ll guide you through the process of building your own windshield for your campfire, keeping your outdoor experience uninterrupted and cozy.
2. Why You Need a Windshield for Your Campfire
Wind is one of the biggest challenges when it comes to camping and having a fire. Not only can it put out your flames, but it can also make cooking over the fire tricky. A windshield acts as a barrier to block the wind and keep the fire burning steadily. This ensures that your campfire remains at the ideal temperature for cooking, warmth, and even ambiance.
2.1 Benefits of Using a Windshield for Your Campfire
A campfire windshield offers several benefits, including:
- Increased fire stability: It helps protect the fire from wind gusts, maintaining its intensity.
- Improved cooking efficiency: With the fire more stable, cooking over it becomes easier and faster.
- Better warmth retention: It helps trap heat around the fire, making your camping experience warmer.
3. Materials You’ll Need to Build Your DIY Campfire Windshield
Building a campfire windshield is a straightforward process that requires minimal materials. Here are the essential items you will need:
3.1 Metal Sheets or Tin Foil
The primary material for the windshield is metal, which can withstand high heat. Thin metal sheets or heavy-duty tin foil work best, as they can easily be shaped and are highly durable in outdoor conditions.
3.2 Stakes or Sticks
To support the metal sheets and create a stable structure, you’ll need stakes or long sticks. These will help you anchor the windshield into the ground and provide support for the sheets.
3.3 Scissors or Metal Cutter
You'll need a pair of scissors for cutting tin foil or a metal cutter for trimming the metal sheets to the desired size. Make sure your scissors or cutter are sharp enough to handle the material.
3.4 Duct Tape or Strong Adhesive
In case you need to secure the edges of the windshield or hold metal pieces together, duct tape or a strong adhesive will come in handy.
4. Step-by-Step Guide to Building Your Campfire Windshield
Now that you have the materials ready, let’s dive into the step-by-step process of building your DIY campfire windshield:
4.1 Step 1: Measure and Cut the Metal Sheets
First, measure the area around your campfire to determine how large your windshield needs to be. The size will depend on the size of the campfire and the wind conditions. Once you have your measurements, cut the metal sheets to the appropriate size. If you are using tin foil, simply tear off a large enough sheet.
4.2 Step 2: Attach the Metal Sheets to the Stakes
Place the metal sheets or tin foil around the campfire area, making sure they are tall enough to block the wind but not so large that they overwhelm the fire. Use stakes or sticks to support the metal sheets, securing them into the ground. If necessary, use duct tape or adhesive to hold the sheets together at the edges.
4.3 Step 3: Ensure Proper Ventilation
While your windshield should block the wind, it’s important to leave gaps for airflow. A little ventilation will allow the fire to breathe and ensure it continues to burn effectively. Make sure your design allows air to flow in from the bottom or sides.
4.4 Step 4: Test and Adjust
After assembling your windshield, test it by lighting a small fire. Observe how well the windshield blocks the wind and adjust as necessary. If the fire is still getting blown out, consider increasing the height of the windshield or adding more material to the sides for additional protection.
5. Additional Tips and Considerations for Using a Campfire Windshield
Building and using a campfire windshield is a great way to enhance your camping experience. However, there are a few things to keep in mind:
5.1 Choose Heat-Resistant Materials
When selecting materials, be sure to choose heat-resistant options to prevent any melting or damage during use. Metal sheets, especially aluminum, work well because they are durable and can withstand the high temperatures of a campfire.
5.2 Consider Portability
If you're hiking or backpacking, it's important to keep your windshield portable. Consider making your windshield lightweight and collapsible, so it doesn't take up too much space in your pack.
5.3 Keep Safety in Mind
While a windshield can help protect your fire from the wind, always maintain a safe distance between the fire and any flammable materials. Never leave your campfire unattended, and always ensure that it’s fully extinguished when you're done using it.
If you’re interested in camping gear, visit Camp Spotter for the best camping accessories, including materials for building your own DIY campfire windshield. Enhance your outdoor experience today!
 Country Estates Mobile Home Community4.0 (5 reviews)
 Dogwood Mobile Home Park4.0 (15 reviews)
 Wheel Trailer Park3.0 (11 reviews)
 Salt Lake City KOA Holiday4.0 (1990 reviews)
 Winslow Court Homes Inc4.0 (16 reviews)
 Lake Forrest County Club4.0 (29 reviews)
 How to Use Campfire Smoke to Protect Your Campsite From Insects
 What to Do When It Rains on Your Camping Trip
 How to Dry Clothes Using Campfire Heat – Essential Camping Tips
 How to Choose the Right Campsite for Your Family
 How to Set Up a Campsite Quickly and Efficiently: Expert Tips for a Smooth Experience
 How to Use Campfire Heat to Cook in a Dutch Oven Like a Pro